Reportage Photography: definition, examples & how to shoot it
This page is ” under construction”. I have Gigs of images to edit and to add to this article. Writing it trust me, is much easier.
The definitive guide to Reportage Photography. Three key areas you need to understand
Reportage photography. What makes it different from candid: documentary or street photography?
Editorial Photography, Photo Journalism or even being a Paparazzi are also similar styles.
To learn how to shoot Reportage Photography, it helps to understand similar styles first before looking at the Reportage Photography meaning and what makes it different from these other styles like documentary photography.
Candid meaning in photography
“The subject is not aware of you taking the picture”. That’s it basically. Your subject may well be aware of your presence or even know that you are taking pictures of them, but in the decisive moment, they are unaware that you are taking their picture. That’s it. The composition, storytelling aspect is not defined in the candid photo meaning. Replace the word ‘candid’ for ‘natural’ or ‘ non posed’ and you will get the idea.
Street photography
Going out with your camera and shooting whatever you find. Nothing pre-arranged, you shoot in YOUR style – on the streets. That’s it. You could be into moody architectural angles & clouds. Walk the streets all day long looking for the right angle. You could be into cats, you could also be a Reporateg Photographer looking for the subjects your research tells you they live around these streets that will help tell your story. The street photography style, again like candid, is more of a technique than a style. It’s about walking around and photographing what presents itself in front of you, shot in your style. It’s not set up is the main thing, the style you shoot it in – that’s up to you.
Documentary Style Photography
The Tate gallery refers to documentary photography as often being used in reportage. Documentary photography documents and shows how it is. It captures facts not moods. It shows what is happening here and now in pictures. Either through one person’s experience or the story as a whole. It’s a record of what is happening. This is as the Tate says, is part of Reportage Photography but not the whole. A big part of reportage is art and portraying what your subject is feeling. Making the picture very pleasing to the eye too, no matter how sad the subject is. I have worked with some amazing documentary photographers – but they are not artists; they are great news photographers.
Documentary photography only publications died off when TV documentary programs were able to be made by one person on a very low budget. Now one person can research, film a story with a 4k video camera, edit and sell it as news or as a 30-minute production. YouTube as you know is now killing off the documentary program as the Networks are struggling to keep viewers and so cannot pay for documentary content like they used to.
With everyone having high-quality cameras and video on their phones now, sourcing documentary content for news has changed beyond all recognition from the days when I started as a news photographer in the early 80’s. We would be the only people on the scene with a camera, even if we arrived an hour after it happened.
Editorial photography
Editorial photographers work for magazines and newspapers, as opposed to working for ad agencies. Editorial photography is about real events, real people and not dealing with model release forms and tight briefs from the Art Director.
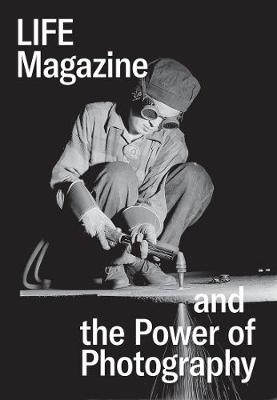
Their style is often shot tighter than reportage ( I shoot even tighter when working for a newspaper) as there is not the space in magazines now like there was in the time of Life Magazine. Even normal magazines as a platform to have your reportage photography published are now few and far in between. Online as you know is taking over so not many are willing to pay for editorial content anymore. Hence bringing in the new genre of commercial editorial photography, but that’s a whole nother story.
Photo Journalism
Similar to Documentary Photography but more focused on telling their version of the story through pictures than just capturing what is going on. In my experience of being a photographer working for national newspapers in the UK for over two decades. The term “photojournalist” was never professionally used in the UK. You always had a journalist and a photographer who covered an event, or you went on your own and wrote captions for your pictures.
Most Photojournalists I have met, have studied the subject, come at it from a more academic background, or are American.
They are interested in getting their point of view across in the story more than covering what is happening in my experience. The style can be anywhere from reportage to the flash-only technique mentioned in the Paparazzi section. The term is used more in the US and to describe someone who takes pictures of events and writes the story as well. So is more of the style of the photographer than an actual style of documentary photography.
Paparazzi Images
The candid shot is about the style of the picture, not the technique used to capture it whereas with “The Paparazzi”, it’s their techniques, their subjects and their motivations that are normally of interest. There are two main techniques paparazzi photographers use.
Long lens
When taking pictures of your subject, if they know you are present, it will often kill the picture. So you use a very long lens and hide in your car, bushes, whatever is available. This is referred to as Paparazzi or undercover photography and not really a style. I shot in this way for many years shooting on a Nikon 400mm 3.5, sometimes with a 2x doubler and monopod. Undercover shooting is all about journalism and getting a picture that proves the story. It’s not about the style.
35mm lens and Flash
The paparazzi-style was, from its beginnings with Pararazzo the Italian photographer in La Dolce Vita and still is – flash. 250th of a second at f8 or f11 if your battery recycling can cope with it. No daylight to ensure you have no blur, just flash to capture every tiny detail of the subject’s dress, marks on their face, etc. As you are often in very low light outside a club, restaurant or need to shoot through a car window, it’s essential. To create the ” You have been papped” look, direct flash from the hot shoe, no softbox should be used. Again is not really a style, more of a technique to get consistently good quality pictures of your subject without having to worry or think about lighting.
Reportage Style Photography
30% – The story
30% – How the subject feels
30% – Art
10% – Luck
The composition, the light and overall feel of the picture are just as important as telling the story. This is a big difference and what makes reportage photography different from documentary photography or photojournalism. The harder the news story, sure the harder the impact. Yet at the same time, using this style can create an amazing set of pictures out of a mundane Monday morning commute on the tube. It’s not just covering what’s going on like documentary photography, it’s capturing it in a way a realist artist would paint it.
Let’s look at the 4 elements of Reportage Photography in more detail.
30% – The story
You need to tell the story. What’s happening? You need to give a sense of place. Have the earthquake, the queue of people waiting for food, the Ferrari in the background so the person looking at the picture knows what the story is about.
30% – How the subject feels
Reportage Photography is a style of portrait photography. It’s all about showing how your subject feels in the disaster, when winning the lottery or commuting on a cold Monday morning. It’s about what’s going on in their head and making sure it comes across in the photograph. Is your goal to show the poor kids are happy? The commuter beating themself up mentally as they dream of working in a beach bar? You have a plan on how you want to show how they feel and you need to pull their mood out and onto their faces when taking the picture.
30% – Art
Each picture you select for your final set should be able to hang on someone’s living room wall and be seen as art. The lighting, the competition, the textures should be pleasing to the eye regardless of the story or how the subject is feeling. It needs to look like art. It needs to be art.
10% – Luck
You set the picture up sometimes. Even then these are real people who can walk off at any moment. Their Dad, boss or the police can appear in a second and ruin a week’s worth of set-up.
Most of your shots are not set up. You can do all the research in the world, you can wait for the crazy guy to lose it and capture the moment. At the end of the day, you also need some luck to make everything go the way you hope it will. You will find the luck comes with patience, planning and persistence, but not always.
The composition, the light and overall feel of the picture are just as important as telling the story. This is a big difference and what makes reportage photography different from documentary photography or photojournalism. The harder the news story, sure the harder the impact. Yet at the same time, using this style can create an amazing set of pictures out of a mundane Monday morning commute on the tube. It’s not just covering what’s going on like documentary photography, it’s capturing it in a way a realist artist would paint it.
It’s capturing the decisive moment that reveals the person’s mood and tells the whole story in that split second: with amazing composition: with great light: all perfectly in focus. It’s the most demanding style of photography I know. It wants everything from you in that one chance moment. There is no second chance. That is why as Henri Cartier Bresson says,
“Your eye must see a composition or an expression that life itself offers you, and you must know with intuition when to click the camera.”
Shooting reportage style must be instinctive. There is no time to consciously think about everything – you need to literally focus on when it happens instinctively.
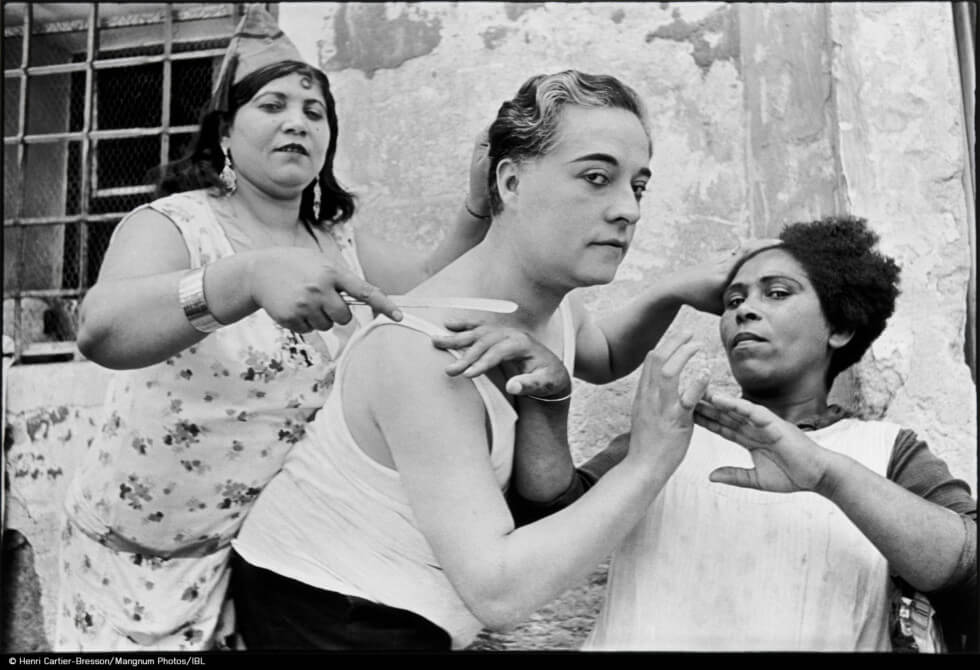
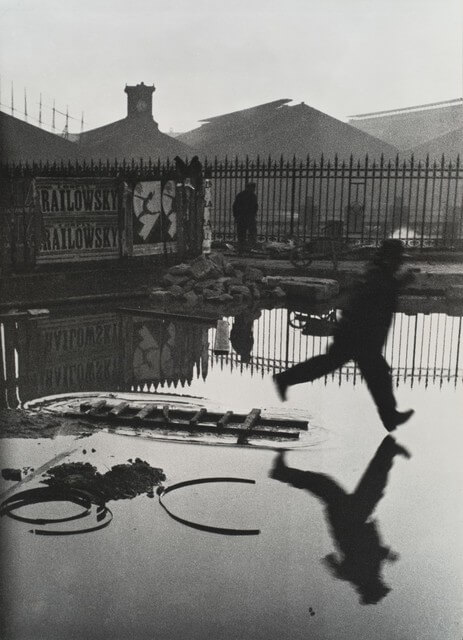
I think to define reportage photography, you only need to look at Cater Besson’s work. You can come across one of his pictures, not knowing it is taken by him and think ” The lines, the deceive moment of taking the picture, I bet it’s one of his.” Many reportage photographers shaped the style in its hay day from the ’30s to the ’60s but no one more so than him. If you want to shoot in the reportage style, make sure you have seen as much of Henri Cartier Bresson’s work as you can and attempt to copy it. Not the actual picture, but the lines, the shapes, the feel of the pictures, and the decisive moment he captures it that makes the picture art.
I keep mentioning the decisive moment. It’s Bresson’s catchphrase but it does sum up the style of Reporateg photography well compared to documentary photography where you just want to tell the story or Editorial photography where you have much more control over your subjects.
The Decisive Moment
The decisive moment is when the person turned their head, dropped their drink, the second before they started to run, whatever it was that summed up the story and how that person felt at the time. It’s easy to see it in a photograph. When you are taking the picture, it has not happened yet, you are predicting when and where it will happen and need to be ready to capture it. The reportage photographers skill is to read when it will happen and often help manipulate the situation to make it happen. The article here on the decisive moment explains it in detail.
Realist Art – shot with a camera
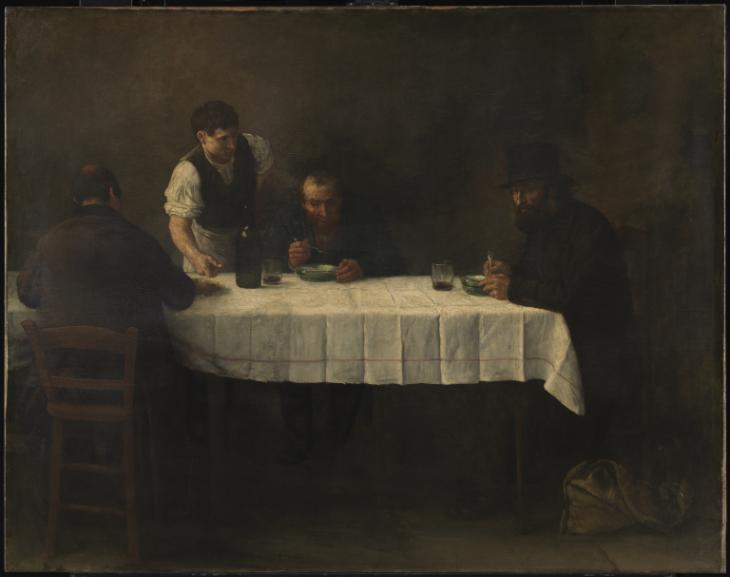
It is good to have an understanding of Realism Art that was popular in the mid 19th century before photography was available as an art form. All you are doing is swapping a paintbrush with your camera and you can capture moving action, but the principles are still the same. You can still study Realist Art today.
“In practice, realist subject matter meant scenes of peasant and working-class life, the life of the city streets, cafes, and popular entertainments, and an increasing frankness in the treatment of the body and sexual subjects. The term generally implies a certain grittiness in the choice of subject.” Quote from Tate on explaining Realism.
Reporateg composition – understand it like a painter
Classic composition is timeless. Classic lighting is too. I suggest you buy a few books on the history of art and study the classics. Even better, go to as many museums as you can and see how each artist composed their subject and the light sources they used to make them look great.

Reportage photographers, examples & books
Reportage is alive and well. But the publications where it thrived are not. Let’s take a look at the history of the style, the photographers that shaped it and where it is now.
When was Reportage Photography big?
They say the golden age of Life Magazine was from 1936 to 1972.
Picture Post in the UK was created in 1938 and closed in 1957 because of shrinking circulation due to the rise of television.
National Geographic dropped to 6.7 million monthly sales in 2015 yet still has more followers than any non-celebrity Instagram account on the planet. The Reportage Photography style features are still of interest to people, they just don’t buy magazines any more, or want to pay subscriptions fees for them online.
National Geographic is the last remaining major reportage photography lead feature magazine in the world from the 100s that existed before the genre died. That’s why many of the best Reportage Photographers have died too. They were all around mid-century – last century.
Reportage Photographers
Henir Cater Bresson is by far the most famous for using the reportage photography style. He was seen pretty much as inventing it. Starting out in life training as an artist, Henri those disciplines to the budding genre of photojournalism after WW11. You can read Bresson’s story here.
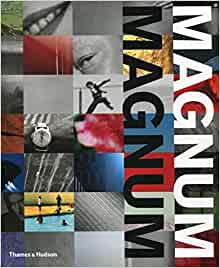
He set up Magnum along with Robert Capa in 1947. Every photographer who worked for Magauim in the past by default was a Reporateg Photographer. Now the agency represents many different styles as the market has changed.
Bill Brandt was known for being one of the first reportage photographers in the UK. Martin Parr is probably the most well known UK Reportage Photographer alive.
Here is a good list of reportage photographers that worked for Life magazine.
When I was starting out, I was wowed by Don Muccullin . I was all set to be a war photographer until someone pointed out a lot of the good war photographers were killed in action. War photographers fall somewhere between reportage photographers and news photographers or hard news editorial photographers. When they can, they paint with light, but when in the heat of the moment, they get what they can from the front line for the front page.
This a great article from the Guardian showing well know editorial photographers writing reviews on their favourite living reportage photographers.
Steve McCurry is probably the most famous living Reportage Photographer who went to India in the 70s with a suitcase full of Kodachrome and never looked back. I didn’t know who he was until decades later, but his pictures I saw in National Geographic over the years when I was young inspired me to shoot reportage photography. There is a great article showcasing Steve McCurry’s best pictures here.
There are many more reportage photographers, but the above gives you a good idea of the style and the most well known.
Reportage examples
What are the classic best reportage photography examples? You would think would be action shots of major events in the world, but they are not. Henri Cartier Bresson’s images are probably the most well known. Photographs of everyday life, captured in reportage style

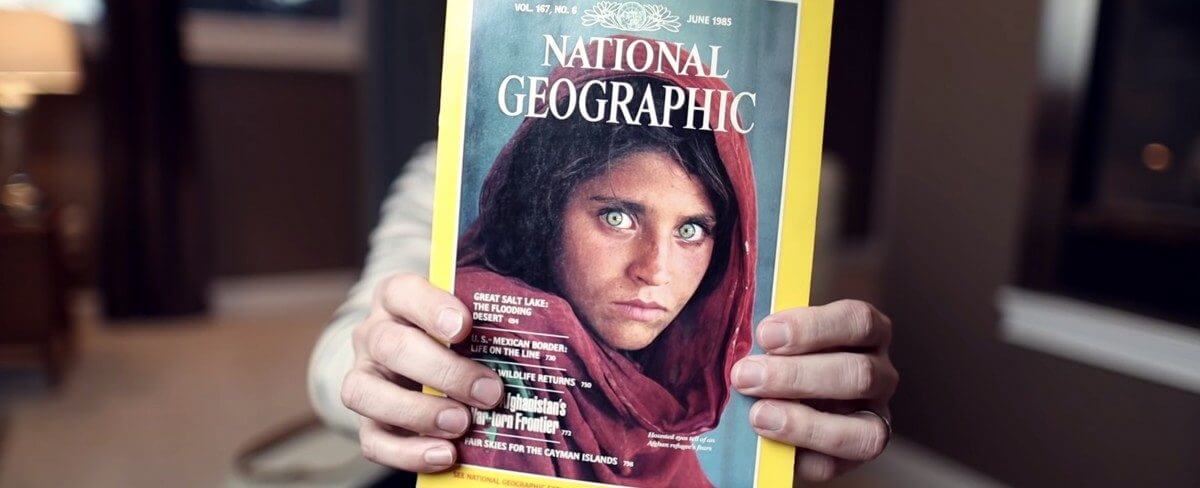
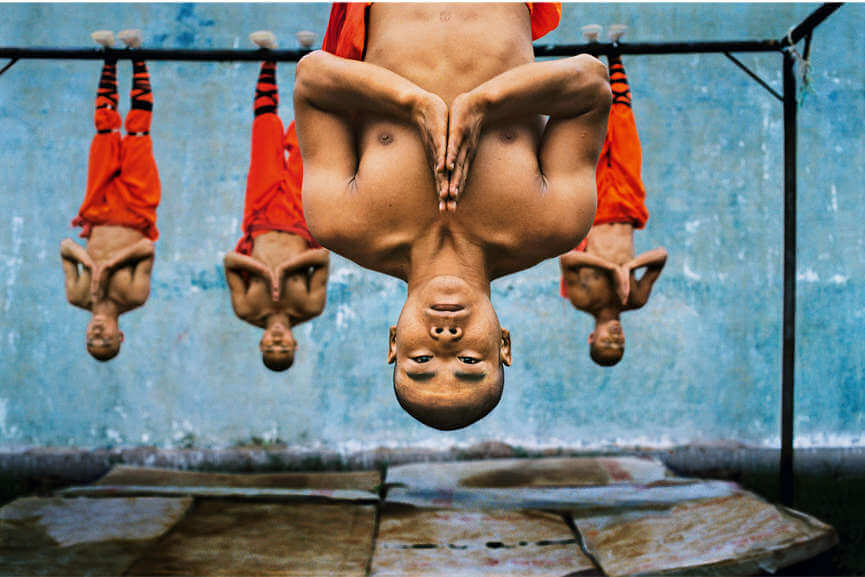
Steve McCurry’s most famous image is of course the Afghani girl and like Henri, some of his images are well known not for the story being the driving force being the picture but the composition and how the subject feels.
As you will see in the How to Shoot Reportage Photography section below, Steve used two of my techniques called WTF mode and the virtual studio to get this shot as you can read here.

Like Steve McCurry’s most famous picture. The portrait of a shell-shocked US Marine in The Battle of Hue in Vietnam is Don Mucullan’s most famous picture. He may well have used the WTF mode technique to get this shot. Prefocused with the camera hanging around his neck crouching down and getting the subjects attention to look up at him.
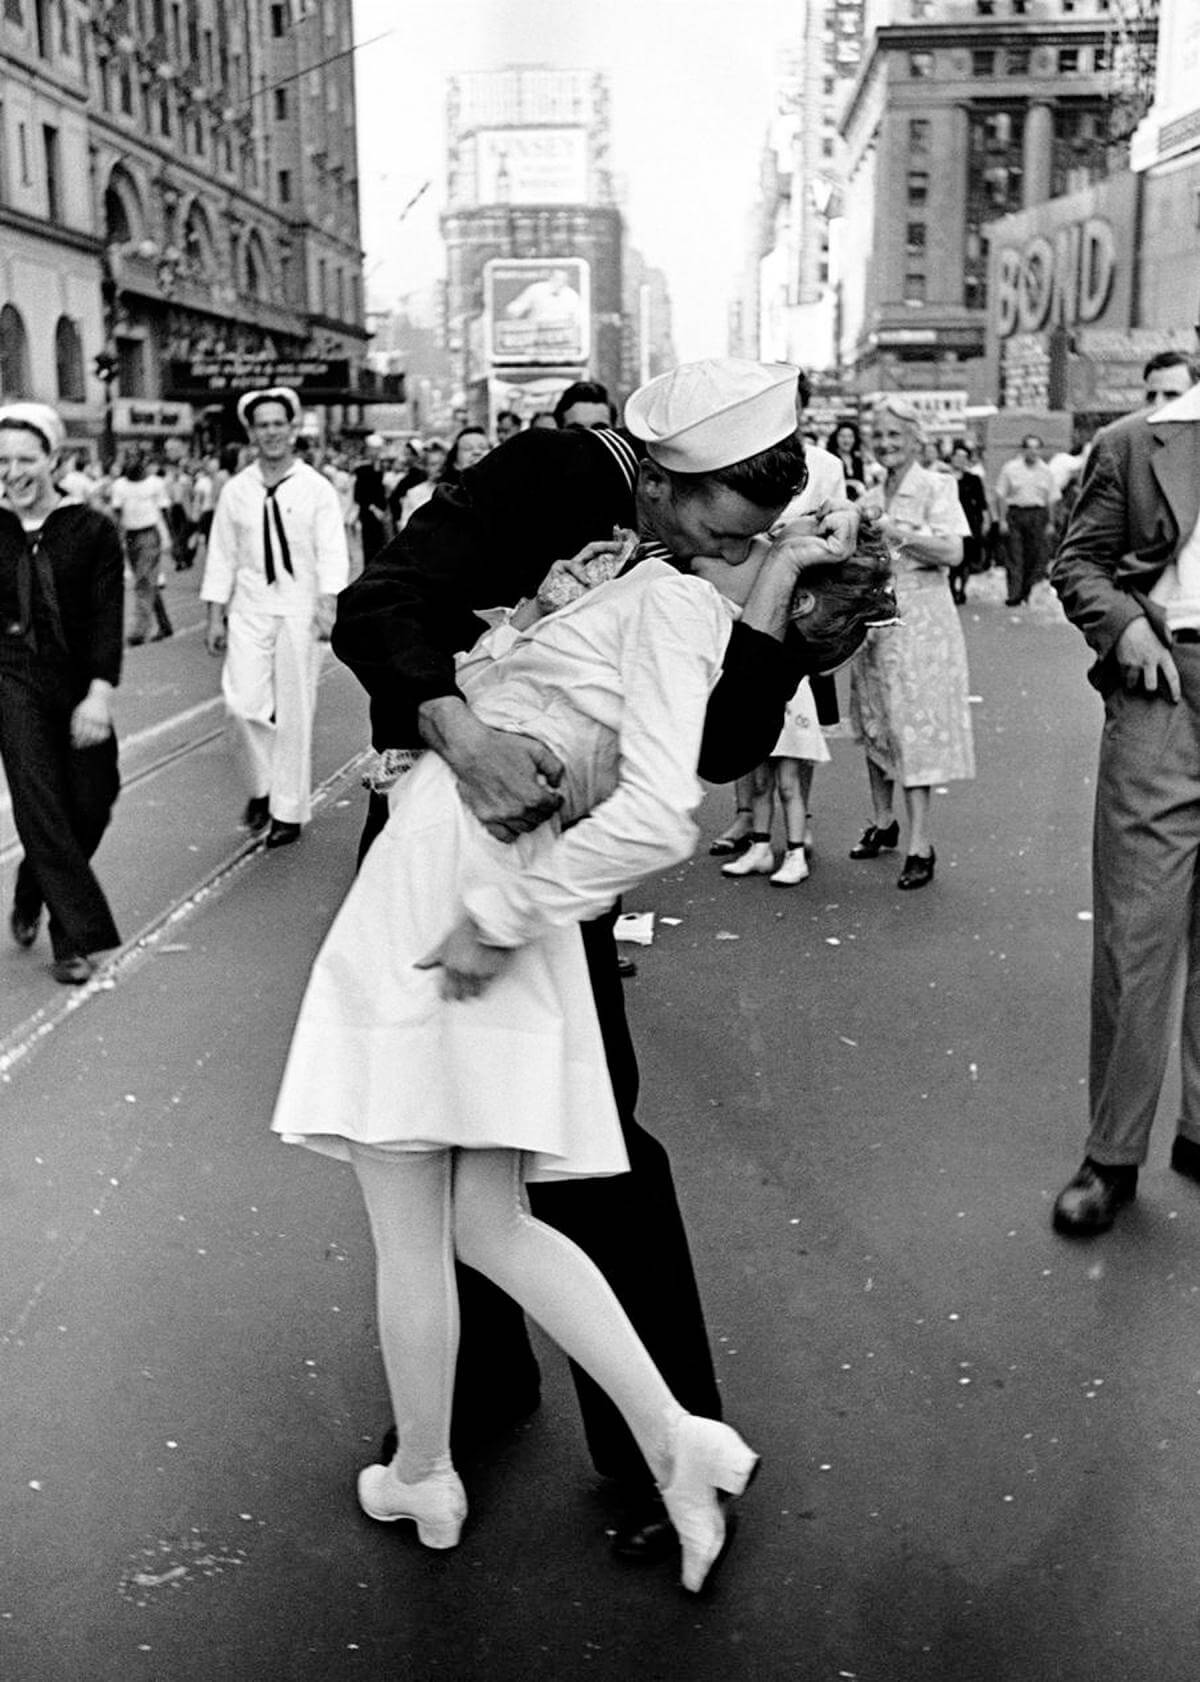
Alfred Eisenstaedt took the famous kissing picture in 1945. It was set up and summed up the end of W11
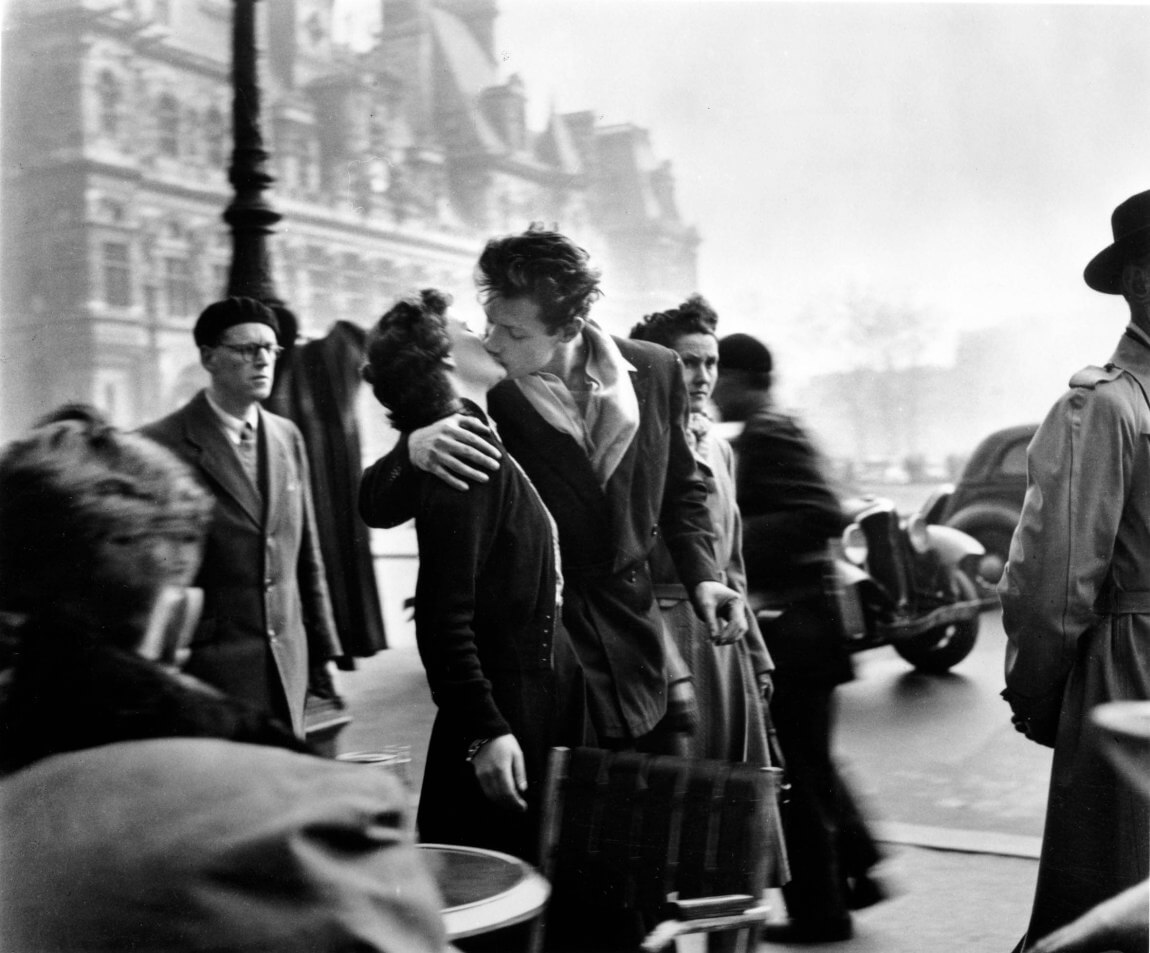
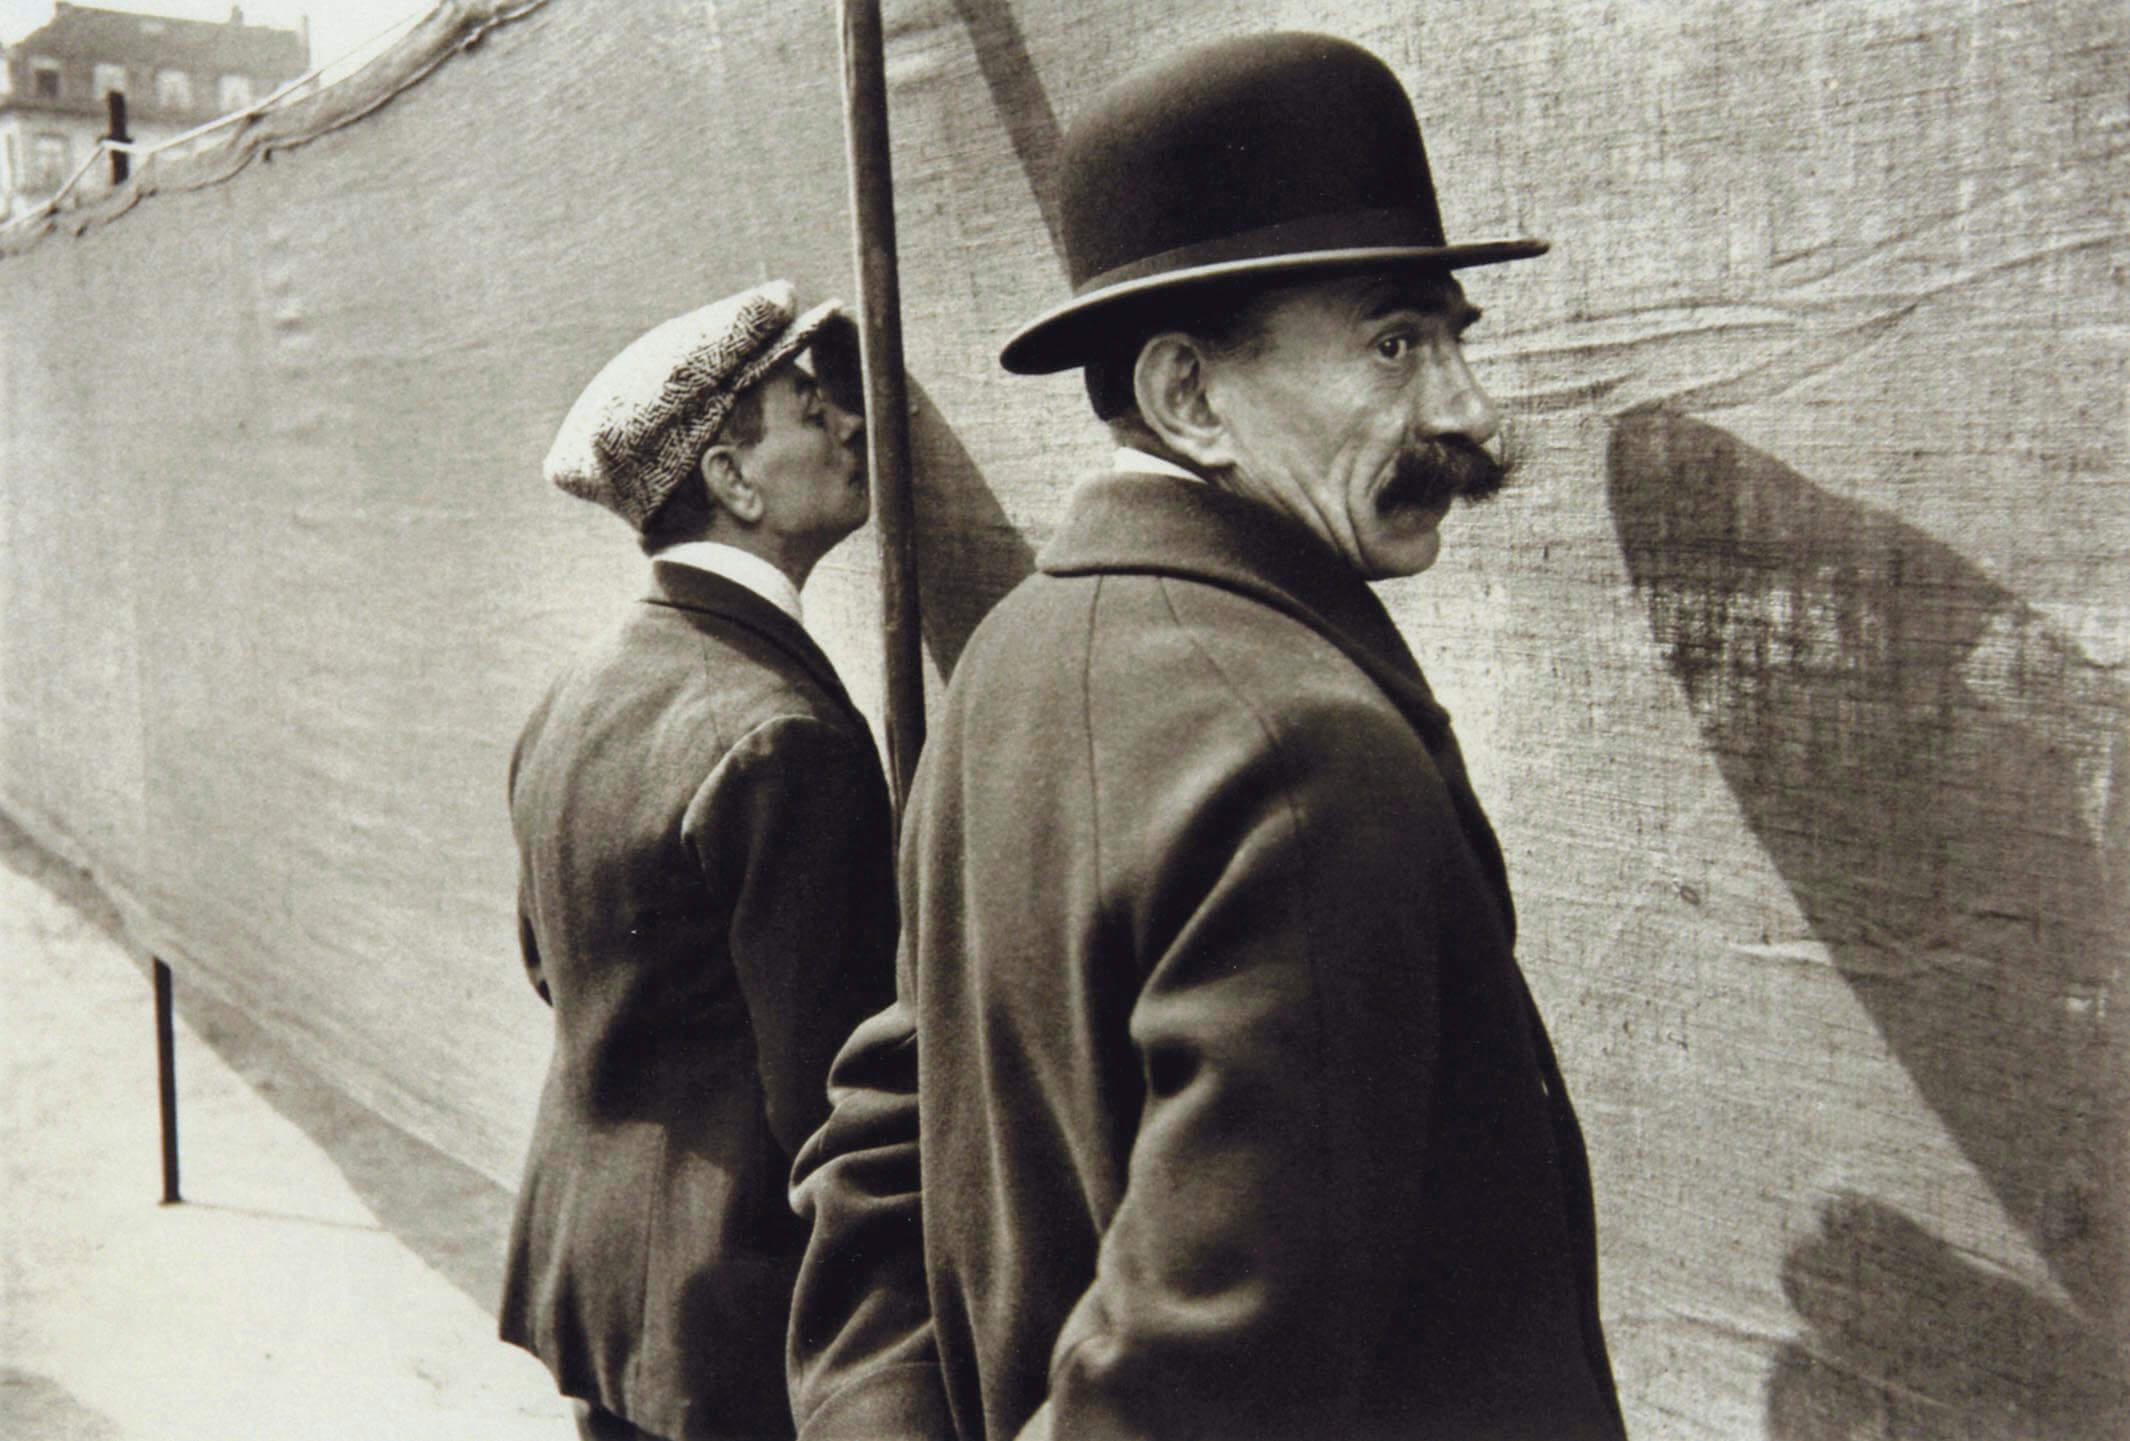
Whereas Robert Doisneau took this kissing pic randomly when taken shooting street photography in Paris with no story behind it apart from the powerful full image itself. I would say in Europe this picture is more famous than Alfreds
This is what makes reportage different from documentary photography and all the other styles. Reportage includes 30% of the story, VE Day 30% how the subject feels as you can see, quite happy about it and 30% art, the arching lines of her body, the straight lines of the street etc. A perfect mix of the three tells a much bigger story – that’s what it’s all about.
The Robert Doisneau story you could say does not compare. Love, passion, the perfect partner? Romance? Is that the story? How do they feel, they feel amazing and full of passion. The composition works perfectly with each sad face emphasising their joy. That’s the 10% luck part. I think that’s an even bigger story to tell people and why the pic is more famous as it captures all three elements so well. That is the meaning of Reportage Photography.
Reportage Photography Books
Reportage Photography Books
Reportage Photography Magazines
National Geographic is by far the leading reportage photography magazine still in print with a 6.5m circulation. If you want to learn the style of reportage, reading this every month is a must.
How to shoot reportage photography?
-
30% – the story
-
30% – how the subject feels.
-
30% – art.
-
10% – luck.
You need to consciously or subconsciously understand what makes great reportage composition. I personally do not know what consciously makes it. I only know subconsciously. It has worked for me for 40 years and I don’t want to learn about the triangle of composition and potentially break whatever it is I have that makes me predict the right composition and be ready to capture it at the decisive moment.
I tend to look at Reportage composition like music, I can tell you in a few seconds if a piece of music is good and fits the style of music I like. I use the same technique with my photography. When I look through the lens ” Is that a DPS ( Double Page Spread) I am looking at? ” I either see the magazine spread, or I see it’s time to move my position.
There is only one correct way to shoot Reportage photography. Your way. There are no correct ways of shooting your subjects. This is not an exam. There are however tried and tested techniques that can help you get access to the shots you want in the way you want them. A lot depends on your personality: the situation at the time of the decisive moment: what might go wrong, or in other words how much balls you have? The list is endless. Whatever shooting techniques you adopt, you need to be able to execute them instinctively as you often have just a few seconds to work out which will work best for the picture opportunity you are predicting will shortly happen.
Predicting the decisive moment
Below I will take you through step by step the top 10 techniques I use when out shooting Reportage. Before I do, there is one major point you need to understand that makes the difference between shooting good photography and Reportage Photography. We have covered the decisive moment in the What makes the Reportage Photography style section above. Predicting when the moment will happen and where you need to be positioned when it does, is what it’s all about.
Reading the crowd, the individual you are literally focusing on, the situation, the wind, the… whatever it is that is going to make the difference between an OK shot and one good enough for the front cover of National Geographic. This is what shooting Reportage Photography is all about.
People say ” If you take enough pics, one will come out alright.“
Wrong. If you cannot predict when the picture will happen and where you need to be when it does, it’s really simple, you won’t get the shot. 1,000s of frames shot or 10, it makes no difference.
I could give many examples but each opportunity has its own mico differences, there is no set way to read the moment apart from instinctively. Energy, is it going up? Then wait. Is the light getting better? Are they not drunk yet? …. Bide your time. The police are about to arrive, get the shot and leave? You can’t always plan for when the decisive moment will come, but you can always be ready to shoot it in a split second. Put your camera down put your eyes down, and you missed it.
The way I predict the moment is this. I imagine what the best possible picture could be in the situation and I get myself ready so when / if it does happen, I will get it. I then help the mood, the positioning of people, I do whatever it is that needs to happen to make the picture happen. Often it doesn’t work out as you hoped. You only need one belter of a picture to make the story come alive and for the magazine to buy it. Go for glory, now and again you find you will get it.
12 different reportage shooting techniques
I have perfected the following techniques over the last 40 years of shooting Reportage as a professional photographer. Each one is a different approach I use to gain access to my subjects before the decisive moment happens and one technical tip at the end as it’s a good one.
Not interested or even better, you don't exist
If the shot will be at its best if the subject doesn’t know you are interested in taking it. Then it’s real simple, don’t let them know you are there or feel your presence if you can’t hide. Wait around the corner or if you can’t, don’t look at them in the eye or whatever you do, don’t look at them through the lens before the moment comes or it won’t come. If you sense they will hide their face, walk away or plain old shut the door in your face the second then know they are the reason you are hanging around… keep a super low profile, camera down ( but ready) and take an interest in the flowers the guy is selling across the road. Don’t let them know you are waiting for X to happen if that’s what the pic needs to capture the moment.
When the moment comes, the subject is focused on it, not you, is natural and comes across in the pictures as being so. The real candid picture is captured.

Spider-Man
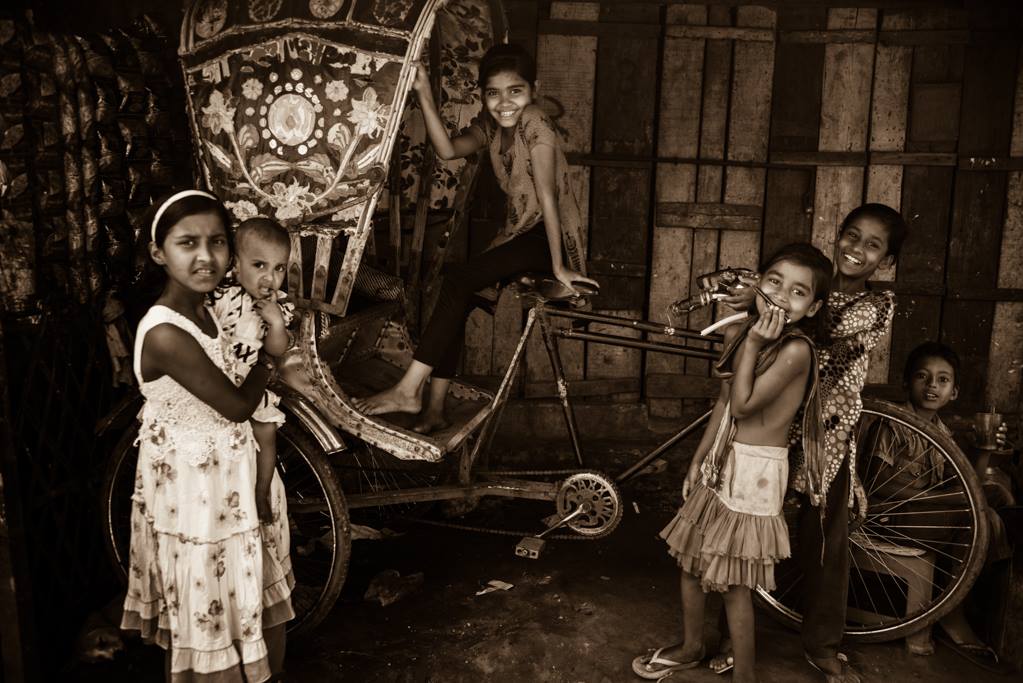
A spider reads a room, works out the route a fly will use to the window, makes his web, and waits. You have found the right light, it’s an hour to rush hour, the bicycle taxies pass at speed just here and you’re hidden from the road by the coke fridge. Your subjects have no idea you are waiting for them. You do tests on bikes that won’t make the edit. Is it best at 15th of second and panning? How does freezing the subject at 500th look? You notice the shot works best with the temple in the background just as they pass over the manhole drain. You turn off auto and manually focus on the drain at f2.8, reframe and wait for the right subject. A real charter on the most colorful bike you have seen all day approaches. This could be your shot. You spend an hour refining your composition whilst picking out the best subjects. You are looking for just one good frame to tell this part of the story for your final set of pics from the trip. Keep going till you know you have the shot in the bag.
Do you know who I am?
I use this mode a lot. 16 years old, the flash was not working so good, sometimes did not fire. I stayed sober to cover New Year’s Eve in London. 5 people crushed to death in front of me. I was so self-conscious about taking the pic and maybe the flash will not work; will have to wait 10 seconds for the recharge and endure the – “How could you take pics of dead people? “. I blew my first front-page opportunity. That was the first and last time I had a problem photographing death, disaster, etc. It was my job to show the world and someone had to do, it. From that day on that person was me. I used this shooting mode professionally for many years and … it works. I had a Metropolitan Police Press pass too, that helped a lot too. But if you walk in like you so have the right to be there, people think, you have the right to be there.
Takes some getting used to and can backfire big time if you don’t jump in with both feet and go in 100%. It can often be the best mode to use in situations where you are being intimidated and will be told you cannot take pictures – if you let them. The whole point is don’t let them. Be in and out before they get time to think ” Who was that?”
If you are covering a story where there are no bad guys, never lie – but walking in like you are the top Nato photographer who just parachuted in to get the story… psychologically to them and to you, makes you that guy and the right to shoot.
If you are covering a bad guy story, lie away, do whatever it takes to get the shot. Often posing as the dumb foreigner tourist who has no idea what is going on works. I covered a story in Spain, In the last year of the festival two photographers were beaten up and thrown out of town with their cameras smashed. The reporter and I went undercover, we rocked up 3 days early, got completely smashed every night in the local bar, and became the ” Crazy brits who have come to see the festival” I took my motor drive off, tool maybe six frames of the guys on horseback pulling the heads off the live geese as they rode past, as I drank beer with my new best friends. It works 🙂
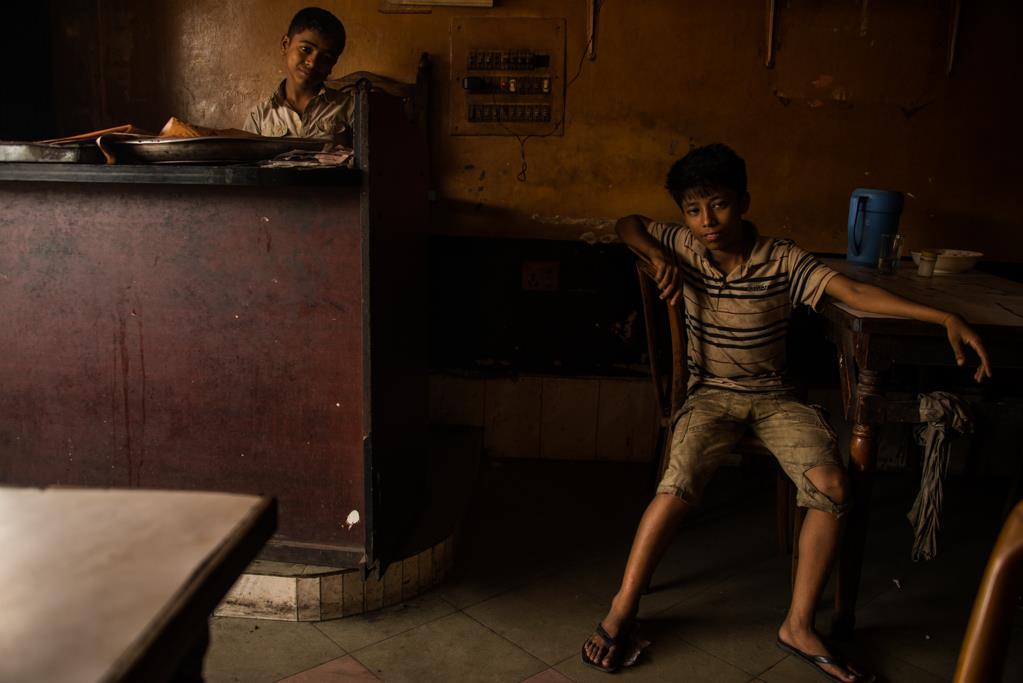
Go in shy, unsure, and your dead in your shoes. Gypsy villages, random back streets in Bangladesh or Cairo, if they are super friendly and cool for you snap away, no need. Be humble and ask, etc. If it’s a hostel environment where they might be scared you are a Child labour inspector, an NGO checking for health safety and they would rather you were not there; BE that person they fear and show them you have every right to be there. Try it, yes I am not short, 120kilos, and was Tighthead in the scrum. It helps but that’s not what gets me the access we all need in these situations. My ” Do you know who I am” face and actions carry me through till either I am done or they work out I am a no one and throw me out 🙂

WTF mode
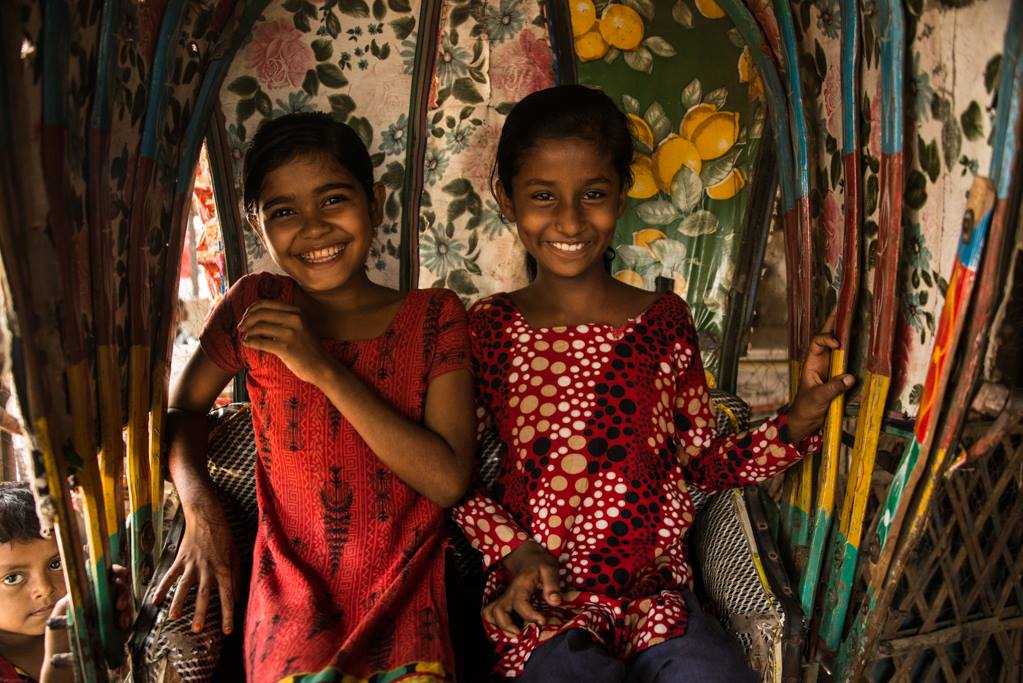
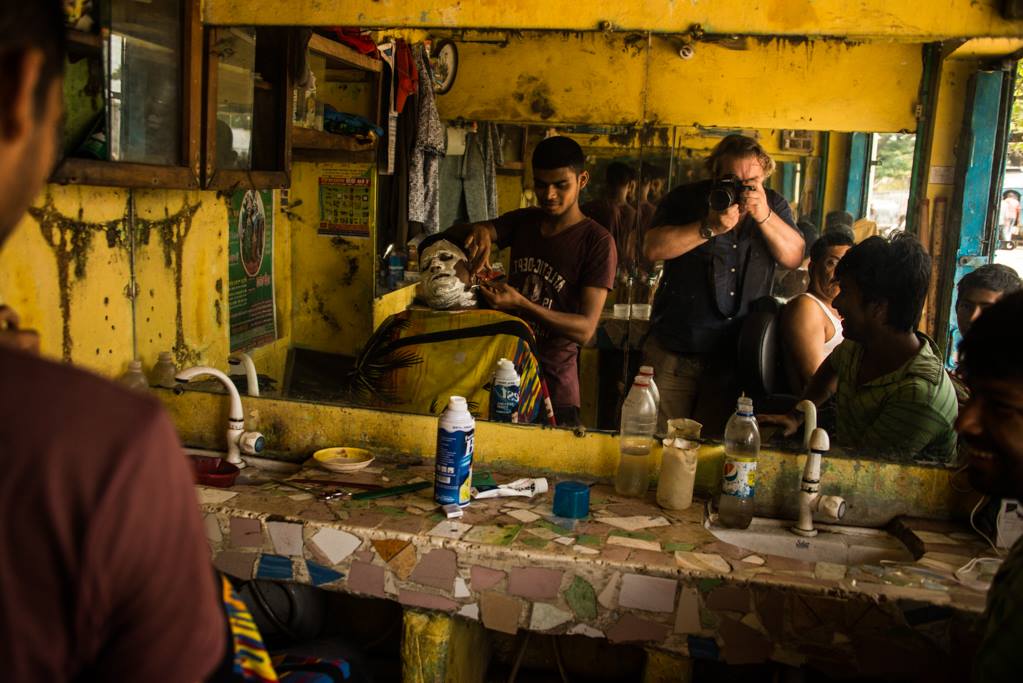
You found the right light, right position as mentioned in the Spider-Man technique above. Just as they pass you yell quite loudly ” HELLO” and wave ( as you focus) – the subject looks at you and gives you the WTF look back. They are genuinely wowed that some foreigner has been waiting for THEM to pass them by. It turns a candid picture into a candid portrait. The subject knows you are there, they are looking straight into the lens and you capture a glimmer into their soul as they read the situation. Scared, laughing, annoyed, however, they will feel, it will come across in the picture making it an action portrait of the person flying past.
The Portrait
Only use this technique when you have read the situation and you are confident it’s the best way to go. They have already seen you are there, so technique one is not an option. They have smiled or giggled with their friends and you can see are secretly wanting you to come over and take their picture. They are not in the light and if moved 2 meters the shot could be really wow.
Take your time, be polite, camera down, and ask if it’s ok to take their picture. You will often be told ” no” and you have blown it. Don’t then take a pic as that’s just rude and you will not get a good shot anyway once told no.
.

So you take the risk, that’s a whole nother subject of do you shoot first or ask. If the shot is in front of you and is wow and if you take it, might blow the chance of a setup shot but it’s wow, take it, smile and walk over to the subject and show them the shot to hope they are not offended by you not asking and you break the ice. You might never get the change again.
If they are OK to be photographed, then be super nice, set up the shot, but don’t expect them to be natural anymore, they are having their pic taken and they are not models. If you want them to look natural, get them to do something, feed the cat, carry on working, etc. If they are not doing anything and the focus of the shoot is old ways of life, then go for the old plate camera formal shot pose as it very old fashion and gives the feeling of old times. If it’s a bunch of young rappers let them pose like they’re on the cover of Rolling Stone magazine and capture the mood of it all. Don’t waste their time. You will get a minute or two and then they will be ” What is going on? You just wanted a picture right?” think the shot through before, set it up – BOOM, that’s it. The moment of wow has gone for them and therefore your shot too.
Set-up shots have a massive advantage, they work really well in a set. If you do a full length, shooting from the ground up with soft light from the right on every amazing looking person in the village – setting a different sense of place in each background, when you hang the best five prints on a wall next to each other, they tend to be more powerful as a set than each one taken in a different pose and light if the subject and backgrounds are quite simila
Do your research
You don’t randomly walk down a street and a great reportage story just happens and get it published in a magazine.
You do your research.
You find when this story happens each year and exactly where or you jump on a plane and go if it’s a natural disaster. Even then you plan ahead, what areas were hit most etc.
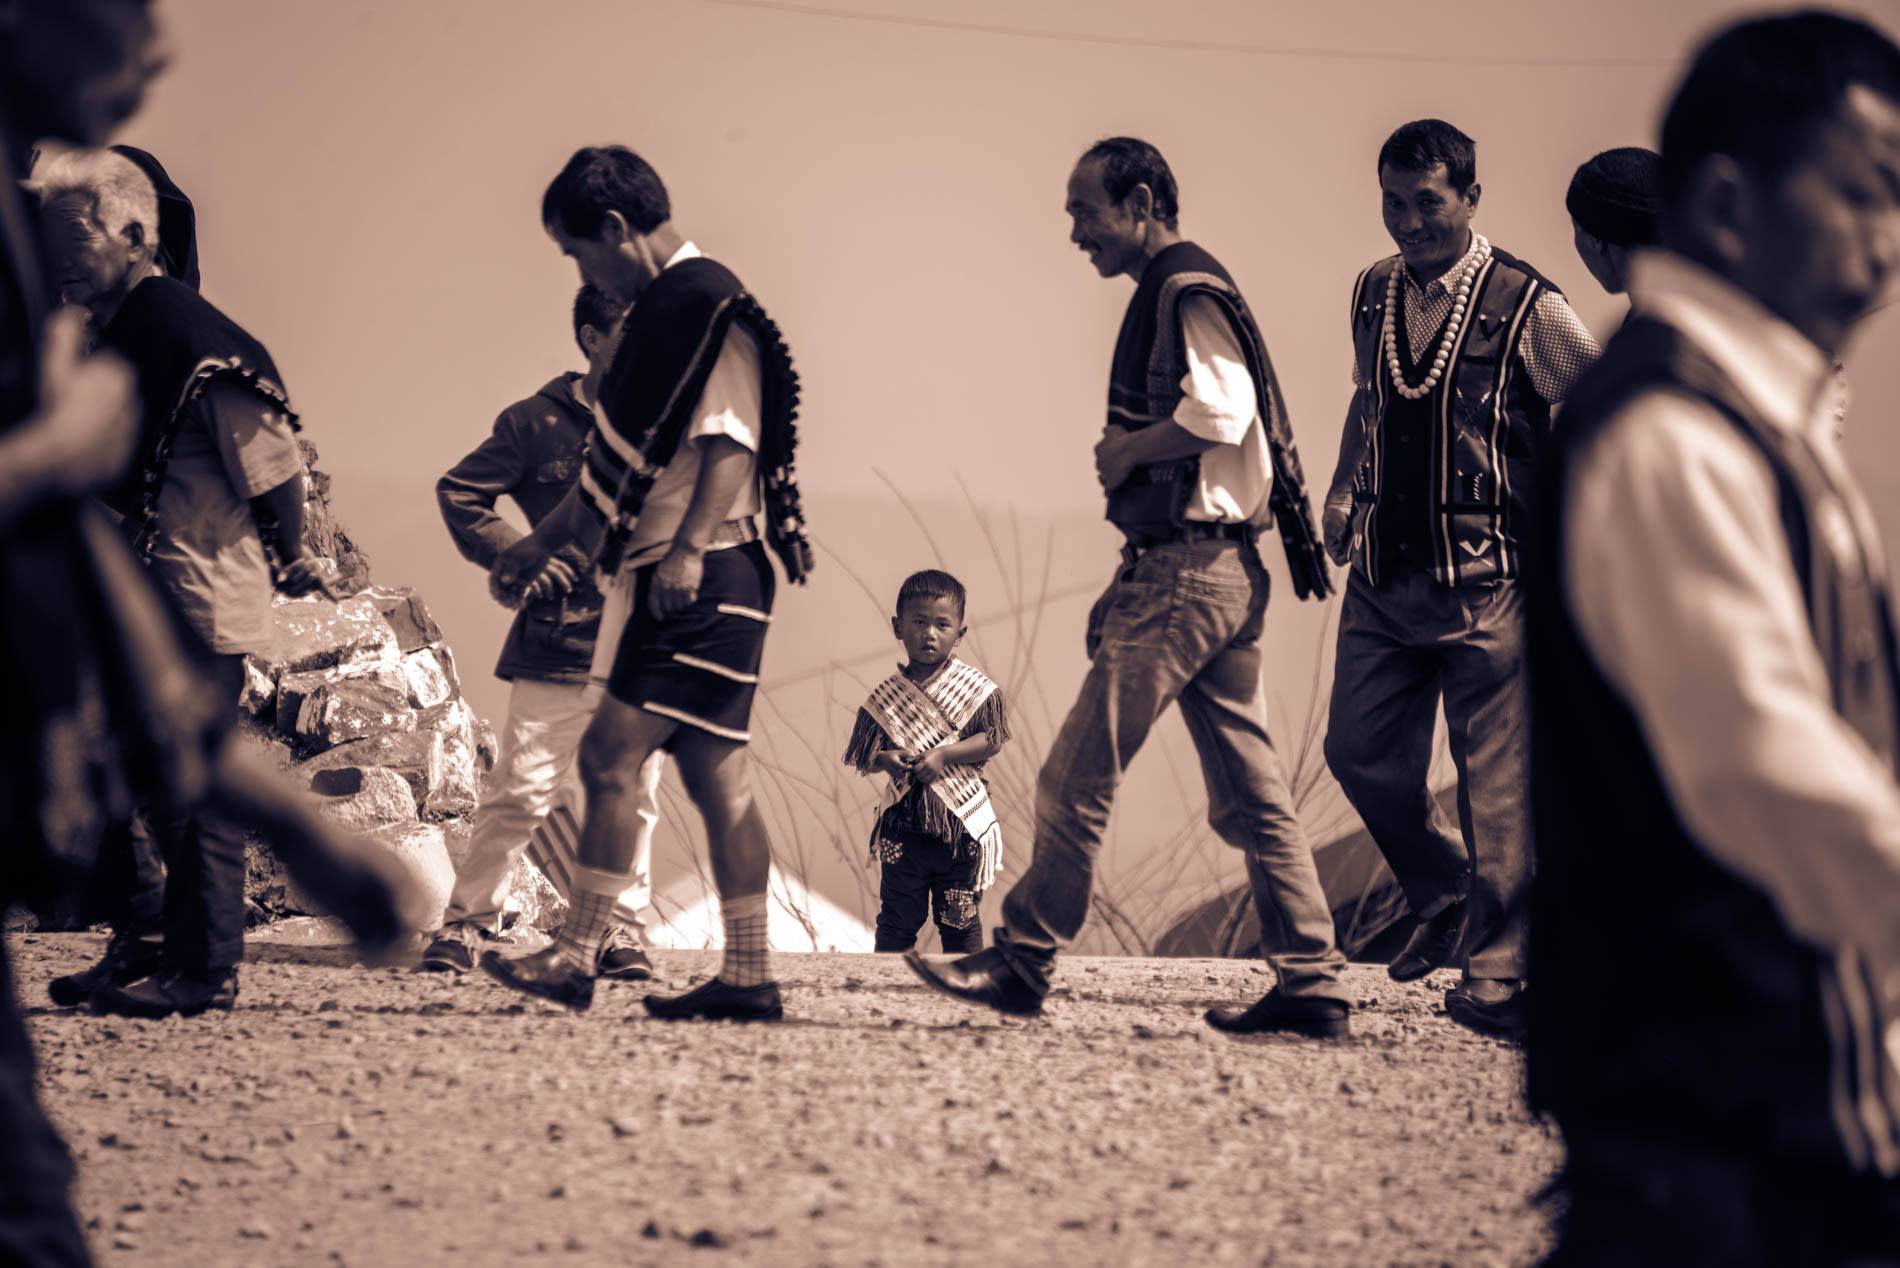
Take for example Holly in India. I was in Delhi one year around this time and had just completed a set of pics called “Head Hunters of Nagaland” where I was the first Brit to visit the village since the second world war. There were several photographers staying at the hostel I was in heading out to a village Steve McCurry made famous for getting good pics of Holly. I didn’t go, on their return, I was told there were hundreds of photographers there on tours, 100s! How could you get any good shot under those circumstances?
Do your homework, don’t be a sheep, research as much as you can before you leave so you are prepared as much as possible before you arrive. When I am researching my Reportage Photography Tours, I research the subject as much as I can before I go to insure I will be checking the best locations and at the right time of the year. I will then spend days or even weeks researching on location to find the best villages, best times of day, the best subjects etc.
In some of the Gypsy villages I work within Romania I didn’t take a single picture for the first 2 or 3 trips there, building up the trust first. A good reportage photographer does their research first. Has the story been published? Recently? What will you get this time that makes it a new story? When does the festival actually start? Do the dancers get there 3 days before when you could set up a studio and get them all relaxed? Make phone calls, keep going till you find out the facts from the rumours you have heard about around the picture opportunity you are looking to shoot.
Lighting
Natural light is always the preferred route for many reasons.
It’s easier to deal with, it’s real and looks real, it does not make you stand out like a lit-up Christmas tree, you don’t have to carry it, the list goes on. the advantage of using lights however is as follow
It’s just too dark. f1.4 on 15th of a second, image stabilizer on if you have it, yeah that will work and at 2,600 ISO or whatever your camera can cope with shooting at night under the moon, candlelight, etc, you are covered most of the time. But if the shot is not about being in the dark and just the person, adding in the light sometimes can make all the difference – it gives you light! It gives you the access you need to photograph the person beautifully when there is simply not enough light.
More importantly, it lets you control the light, it lets you make the picture link up the next shot that is a different person different background, same story, and it lets you set those all-important catchlights in the eyes just how you like it. It lets you throw some black material over a door and shoot the soaking wet fishermen on the deck of their boat as you got them to all to your studio in London and threw a bucket of water over them. It lets you make them look attractive or make every wrinkle pop and look 20 years older than they really are. You are totally in control. It only really works however in portrait mode, so if that’s your style, I recommend you spend the time testing and work out what works for you. LED on a stand? Flash and small softbox on the hot shoe? Bounce flash? Don’t use the bounce is my advice, it looks terrible most of the time. It’s your choice, it’s your style. I use flash on a hot-shoes with a small softbox, carry a black piece of material in my bag, and a small reflector for the catchlights. If I plan to do portraits and my subject knows I am coming I will bring a light stand for my flash to set up a small studio and grab them as they come out of the church, etc.
The Virtual Studio
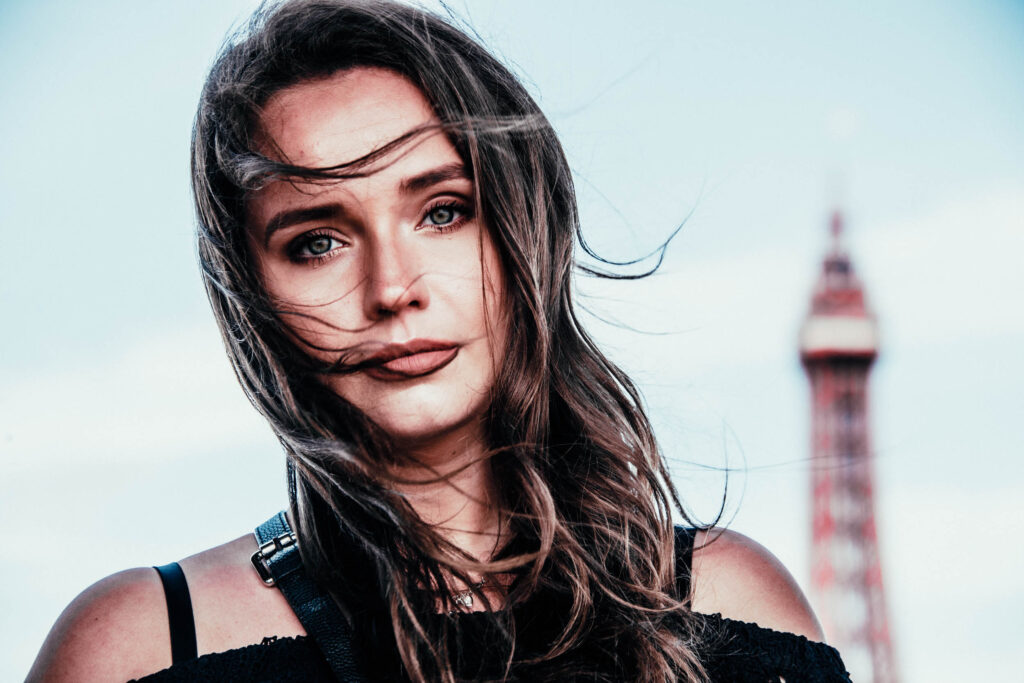
You are in the back of the jeep, your trekking up a mountain, you did not bring your lighting. You have a great portrait opportunity and want to get the best light on a tight headshot. The great painters over the last 500 years since the paint was invented all used this lighting mode. Go to any art gallery and look at the portraits, all the same. A north-facing window, slightly to the left or right, slightly above the subject. Getting your subject to sit with the window like this is great if you can get them to, but often it’s easier to get them to stand in a doorway, say 1m back into it, look at the catchlights in their eyes, they look like they are in a studio, no lights, no background yet you get the studio shot without looking like that lit-up Christmas tree.
Sniper mode
A purist can say ” Just carry a 50mm”. I love my 50mm 1.4 Sigma Art lens and when conditions allow I use this lens for shooting in portrait mode. There will often be times that your subject no matter what you do, will not be natural if they think you are taking their picture. Shooting out of the second-floor window, or too far away for a normal camera lens to fill the frame so they think they are safe from being captured on film or just plain old you cannot get close enough like a festival or riot – a 300m makes all the difference. I lose depth of field by using my Nikon 28mm to 300mm, but I would rather have that at the ready when in Nike mode when the action happens 50 meters in front and they assume I am too far away to capture it than having a 50mm hanging around my neck. Have 300mm is also great for making the sun bigger in silhouette portraits and for just good old-fashioned sunset pics.
Pay for it
When I hear ” If you go there, they will charge you £1 for each picture you take of them”, I don’t care how good the picture opportunity is, it’s not for me, that’s for tourists. I never pay for access unless its a buy up for a newspaper. For my tours I do a set of prints and bring them on the next trip. If you pay for a shot, you have lost all respect from your subject and you will get pics of people with their hands out from then on. I strongly advise you never tip or even worse, pay upfront for a shoot. But this technique is called Pay for it ???
There is a gypsy village I have been going to for years in Transylvania. I am greeted with respect, I head to the blacksmiths and order like I always do, two horseshoes. Sure I am paying a bit too much and they know I know that, but they also know I am paying for a show too. We get 40 mins of sparks, sweat, flying hammers with a backdrop of a 100-year-old forge and as much action as you can cope with, for £2.50 a shoe.
If you want to photograph tradespeople in the market or where ever, paying them to do their job, is totally OK. They are then focused on their work, not you, you get the natural pose yet are in portrait mode and you don’t get chased by 10 kids down the street from now on in.
Nike Mode
You are walking around, nothing is happening, you have time… check the light, set your camera shutter and aperture so it’s right. Have your lens manually focused at 2 meters or at least be ready to focus in a second, camera with general zoom switched on ( I use a 28 – 300mm for this mode) as you have your spare batteries in your bag to last you all day. You would be amazed how many people miss the moment when it jumps out of nowhere at you. Camera up, shoot first, focus, shoot again, keep going till the moment has gone.
You will find you will use one of the 11 shooting modes above in most situations. If you keep it simple and stupid, you will slowly learn how to instinctively know which one to use as you turn the corner and the wow you have been searching for all day presents itself in front of you. This then allows you to focus on the most important factor, the one I mentioned right at the beginning, to predict when the decisive moment will be, where you need to be to get it, and in what shooting mode you need to be in to get it.
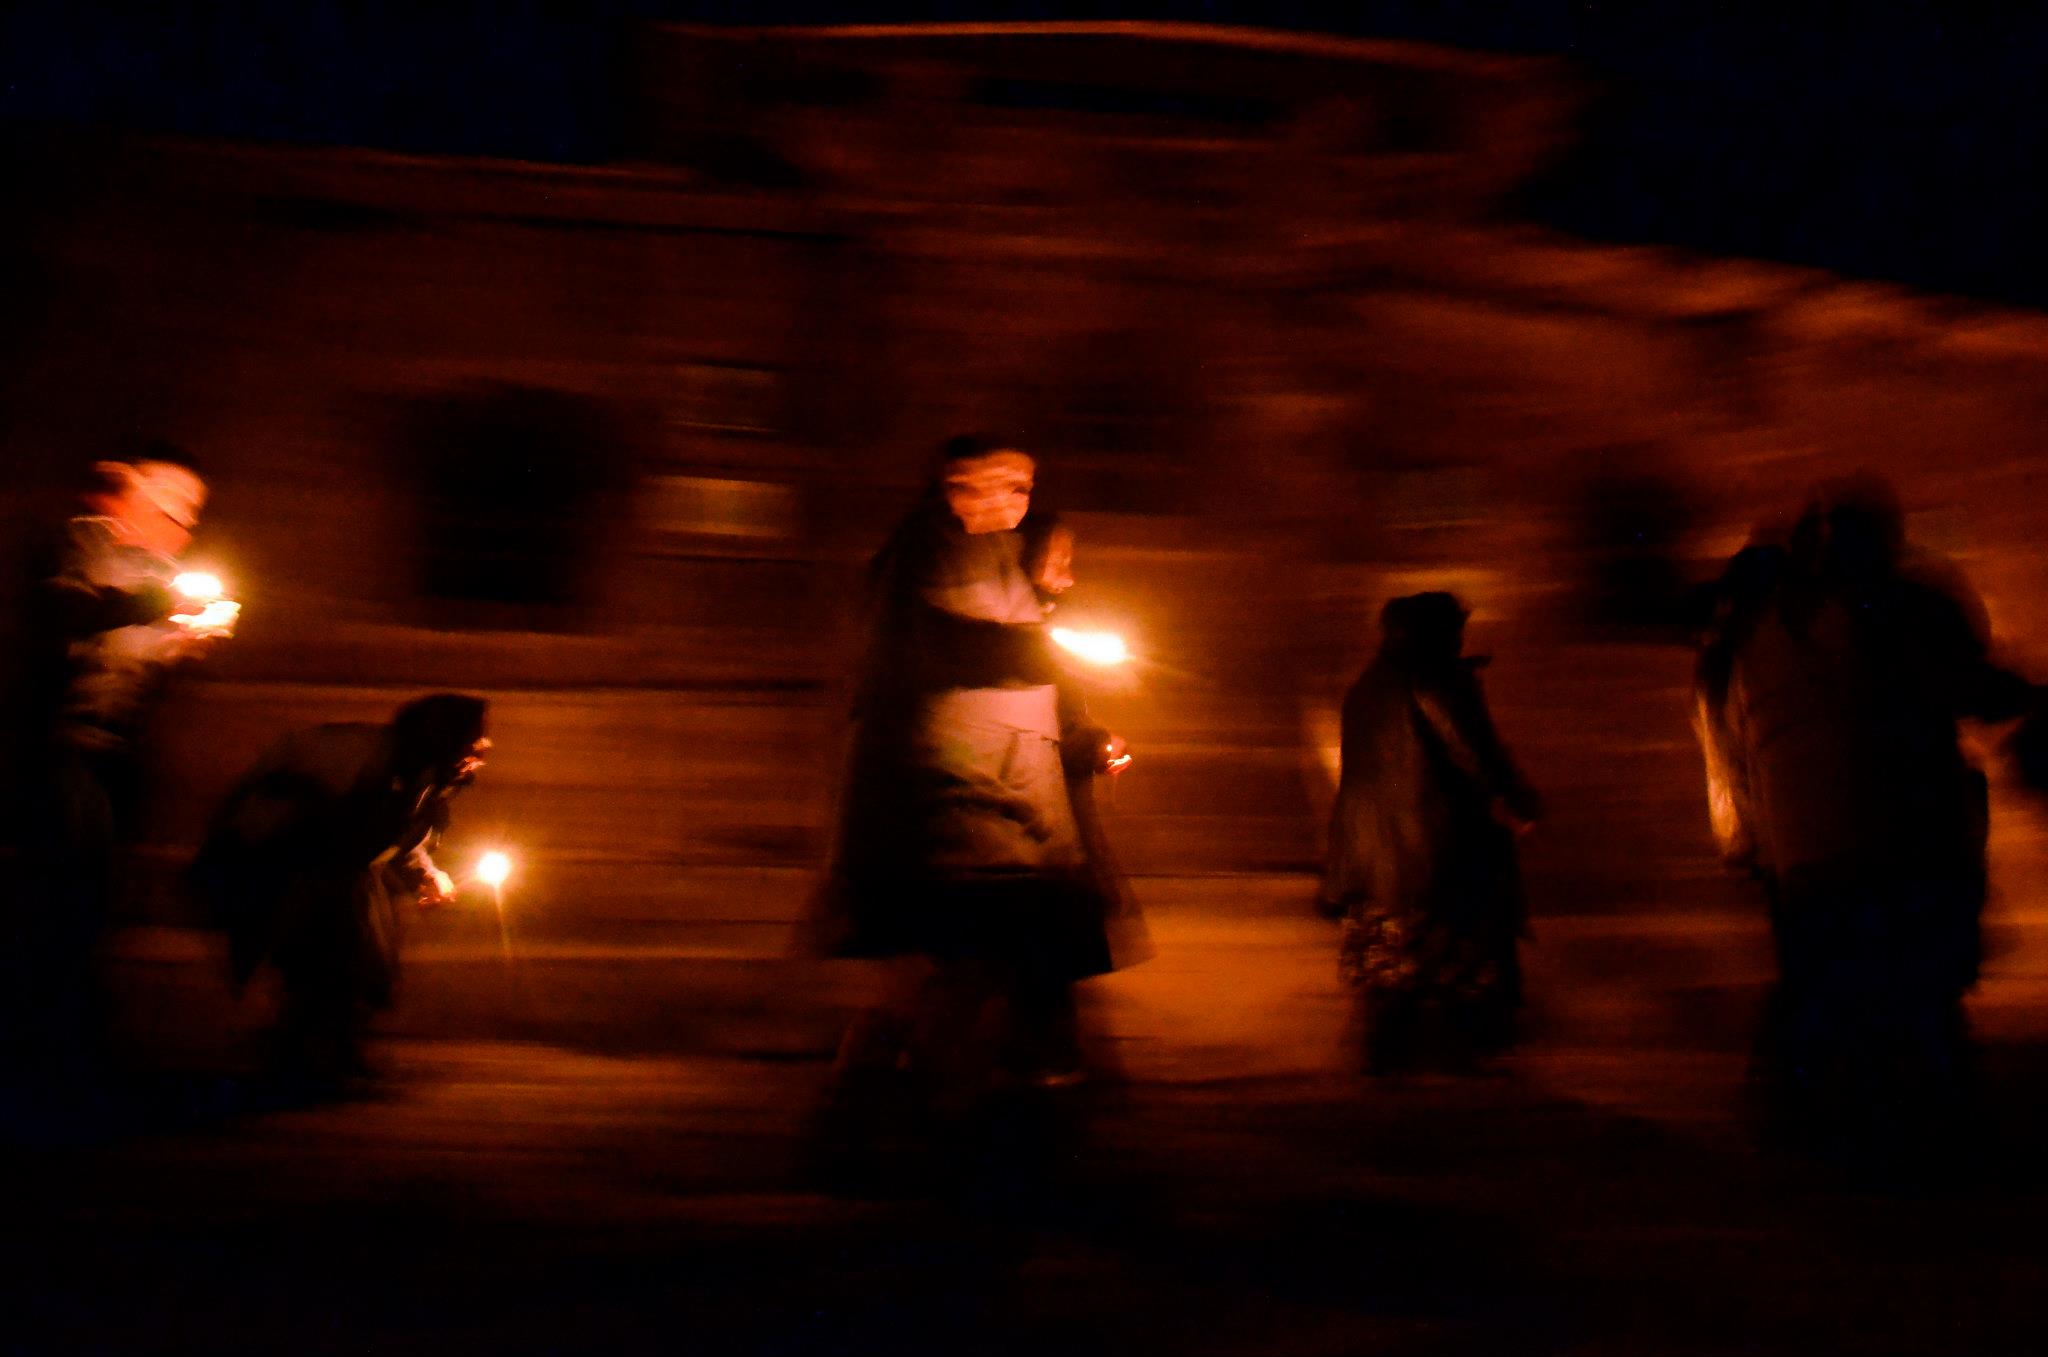
Panning with Image stabiliser
I won’t go into the tech side of things here as it’s moving from the lens to bodies with Mirrorless these days. I am an old school D3 Nikon man. They say Panasonic is the best for Image stabilisation systems.
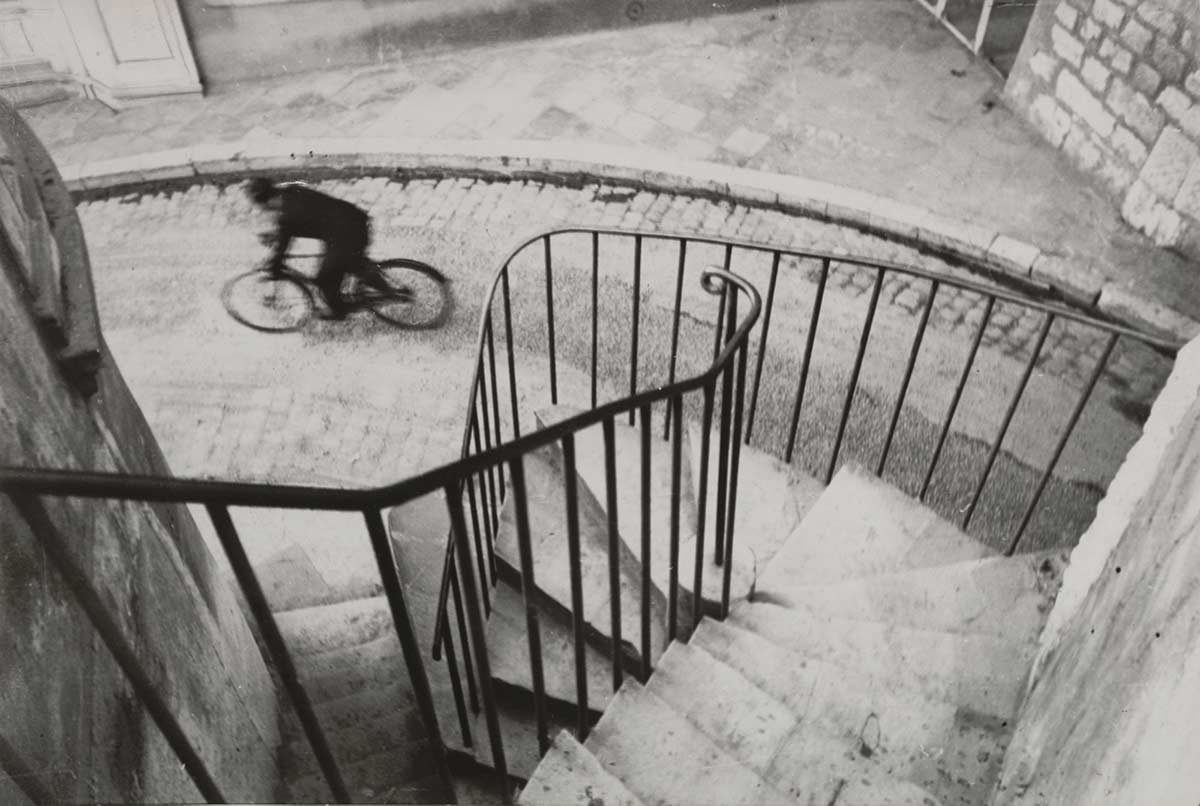
Whatever kit you have, if you are shooting in low light, on a low shutter speed, 15th to 60th say, when the action is happing; you can sometimes capture a pin-sharp moment when all around is slightly blurred. See the pic here. the is frozen as all-around shows movement. You cant plan these shots and you will lose most, but one belter is worth it. This is probably;y the only time I would say ” Take lots of pics as one good one might come out” If you are shooting street and in spider man mode, you can do this over and over and check each image until you get one that literally caught the eye and stabilised on it.
Reportage Photography - summing up
I can’t tell you how to compose a Reportage Style Photograph. That’s a personal choice, it is art, it’s…
For me personally, it’s simple.
I have my Reportage Photography style that I have perfected over the years starting from when I 16. I am 56 now and my style has not changed much or the techniques I use, as I have shown above – it’s all about access. When I am looking through the lens, if I am looking at a DPS in National Geographic, it’s composed correctly, the light is right and I wait for the decisive moment. That’s the hard bit of Reportage Photography. You can bust your balls getting a week’s access to the most amazing story. If you can’t instinctively see a good picture when you are looking at it through the lens – no matter how good the story, you might get the front page as its news, but you will not get a good set of reportage pictures. The angles, the framing, the exact moment to press the shutter, that has to come from you. Read the books, read National Geographic every month and all the other magazines you want to get published in. See what picture styles and what photographers impress you. Work out what it is about their style that is impressing you beyond the amazing story. It’s real simple, try and copy it adding in your own flair and view of the world to your style. Practise practise and practise till you know what instinctively looks right in the viewfinder, will also look right when printed in a magazine.
Make it art
For me, a set of reportage photographs, like a set of documentary pictures, will clearly show the whole story from beigi9nn to end in no more than 10 pictures, because a magazine will never run more than that for the feature. Instagram lets you tell a story in a max of 10 pics. There is a reason for that. Yet each picture has to be a work of art on its own, worthy of being hung on a wall, telling its own unique mini-story within the bigger set of pictures. The background setting a sense of place, the person’s expression showing how they feel in that space.
Once you are taking pictures using the techniques above naturally, you can start to think about how each opportunity can work into your set of 10 pictures. The final set that walks your audience through the whole story. When setting out to cover a story, you often will not know what it will be till it’s over ( they are the best stories to cover). If it’s not hard news, you normally have an idea from your research on what you are looking for to tell the story. You need to set the scene, show a sense of place, the mountains around the village, the water tap in the square with a queue of young children, buckets in hand shows your reader this is not Monte Carlo. The story is about x, show it. But this is where the reportage photography style kicks in, show it from different points of view, the child labour shot, the Fagan character, the individual sad pic, the sheer number of them when all washing together after work.
Focus on telling the big picture in 10 pictures
Each picture needs to compliment each other at the end to show the ‘big picture. Maybe it’s a journey from beginning to end, seasonal, different portraits. Whatever it is, think it out beforehand and see how each days shoot or micro shooting opportunity within the one hour you have to cover the story can fit into the bigger picture when editing it down to no more than 10 pictures if you are the editor. If you are submitting to a magazine, you show many more and let the picture editor choose which frames they want but make sure they are art, as well as tell the story. You should still be telling the story in no more than ten picture sets, leaving the final editing choice for each image to them.
I leave you with this thought. The final set of 10 pictures should tell the whole story whilst showing how each subject feels. Every picture however should also be a stand-alone piece of art someone would buy and hang on their living room wall. If you can achieve that, you have mastered Reportage Photography.
All pictures are taken by me, Duncan Ridgley unless stated on the picture as being taken by another photographer.
If you would like me to teach you how to take Reportage Pictures using the techniques above – have a look at the tours and workshops I have coming up. If you like my style and would like to hire me, let’s talk 🙂